2024-12-09 18:31:17|Myriagame |source:minecraft skins
This tutorial is set by the author to use the CC By-NC-SA protocol.
The author's own video tutorial (Japanese)
http://forum.mineCraftuser.jp/viewtopic.php?f=13&T=17975
Direct text:
Table of contents:
0 activation block mechanism introduction
I machine block core introduction
II II Introduction
III machine block motor introduction
Introduction to the IV machine block extender
V seat introduction
Vi tool introduction
VII module and control board
How to build a tank tank (Tank Type)
IX weapon use and rotatable tutorial tutorial
X machine control board tutorial
Several difficult mechanical patterns analysis of XI
0 activation block mechanism introduction
Only after one machine block is "activated" can it be used as the core (the block becomes the entity)
Part of the "robot" appears.Otherwise, the state of the block will be maintained.
Can a machine block activation can simply judge through the color of this block?
The block is not activated>
The block has been activated>
(Material judgment is limited to the situation where light and shadow) (all machine blocks are dark materials when not activated)
You can find that the four corners of the rear block will appear "current"
The black side is the party that launch "current". On the one side of the yellowing is the receiving party
The method of activation of the machine block is similar to red stone, but it is not the same
Below is an example of a block activation
Everyone may think that the activation method is similar to this
(Red stone is the core of the machine block-Joint Core)
Then we destroy a block and try
Why did the back of the back lose activation?
Because the active method is actually like this
So once we destroy the effect of the square
So when you set up, you must pay attention. In fact, the machine block also has a "orientation"
Basically, you placed the machine square in which surface of a machine block, and the tail of the mid -sequel (block) you place facing the face
However, in general, it is basically not paying attention to this kind of problem when it is built ...
I machine block core introduction
The core is the necessary blocks of all mechanicals, and it is also a place where the "mechanical type" is set. A machine can only have one machine core. If there are multiple machine blocks, the newly placed square will "activate" once ...
(I won't talk about it, whoever puts two cores without any idle one)
GUI here
What are the benefits of Japan and Britain?Who said it is right!
Red Circle: Putting the corresponding module into the core block will become the module
Yellow Circle: Mechanical types, there are several species, which affects the attributes of vehicle attributes, will be said later
Blue Circle: Machinery building testing, you will check whether your vehicle meets the needs of the vehicle type you choose to choose a specific module
(Click that button to tell you) (After the vehicle block is updated, you need to close it and then open the content to update it)
(For English/Japanese bitter hands, the bitterness is afraid that the head will become Steve's head and meets the requirements)
PS: Basically, he didn't tell you what the specific blocks were, all of which were combined, so there was no egg!
Purple Circle: Well, give your vehicle name
Light blue circle: When you activate this core, take this core immediately (if you have a seat)
Green Circle: Do not promote (turret) This option only appears when you choose no unit type
Tip:
1 The core will automatically change the material after you go far and become a "closed" material
2 When the multi -block structure becomes the entity, only the core has a collision box and the damage judgment
II II Introduction
The most basic building materials need to be said?
Of course, the module and control board are also accepted ...
Tip:
1
III machine block motor introduction
There are many modes to choose from.
The keyboard control board can be used as a turret circle
Insert a mechanical control board can be used as a necessity for building a specific mechanical type
Inserting item control board can be used as a sight
Insert the humanoid mech control board ... no need to say
Insert the worm -type mech control board ... Ibid
Insert the animal mech control board ... as the name suggests
Introduction to the IV machine block extender
A block that enters and exits up to 300%, the shortest can be extended, the minimum can be reduced directly.
You can also insert a variety of boards
V seat introduction
For places to sit, a machine is up to 4 available seats
You can modify the height of the seat so that the ride can be inside the machine instead of the external wind.
(More support, but only Item board control)
Introduction to VI Tool I will tell you that I set the tools as a detailed view tutorial because I am too lazy to open the page one by one?
Anti -activation ball (because it is very important, it is a big picture):
The machine hit by it will return to the square state
Ceramic repairer:
Right -click to divide a machine block into several portions, with the chisel use
(Press the machine square to turn it into a pure white square, turn it into 4x4x4, the third down to 3x3x3, the fourth down to 4x4x4, the fifth down reduction) The chisel:
Carving the squares separated by the ceramic repairer
Polycinating board:
You can dye the block separated by the ceramic repairer, right -click to change the color, right -click the core to configure the color
(Each machine can have its own separate color configuration) (shift+right -click to be restored to white)
The color of the palette itself will not be changed. The color set by the right -click the core is the color of the paint gun. For example, if you right -click and turn on the square block 1 into white, then the right -clicking block of the color panel is still green.But you use a paint gun to switch to 1 and spray it. White is not gray.
Spray painted gun:
The function is similar to the color tone board. Shift+right -click changes to the color (the number will change), but this can only be dyed like a single square like a chisel, for example, you can play like this
I wish the Encyclopedia more better, the better = w =
Remote control:
Right -click against a machine block, the remote control device is bound to this machine block, and then right -click the remote control to open the interface of the binding machine block. The mother is no longer afraid that my machine core will be wrapped inside!
VII module and control board
Go to the items/square yourself!
How to build a 59 (Tank Type) (tank)
There are only two types of tanks in the world, or 59, or 59 changes (to be dragged away by the webmaster ...)
First place a core and adjust it into a tank mode.(I just said how to adjust it, what? You didn't see it?)
Basically understand it ...
If it is not clear that the bitterness is that the head is not satisfied, the entry of WHEEL shows the bitterness, and the "Found 0/Need 2" shows 2 wheels. Let's talk about the construction mode of Tank Type
White wool is an ordinary machine block, the piston is a machine square motor, and red is the core.
Tanks built in this 1-2-1 mode can be expanded horizontally and vertically.(Generally speaking, it is very simple)
Show as Steve's head is to meet the conditions. The black line is a prompt that comes with the MOD after satisfaction.
(What is the so -called "What" is a square)
Build 59 advanced A
If you want to make it more realistic?
Put the wheel module in the Model groove, and our Little 59 will become like this just now
Build 59 advanced B
The wheels are not moved!Don't move!Don't move!(Because it is very important, say three times)
Then we need ...
Dangdang!Mechanical control board!(Here we should have the sound of dream love)
We put this product into the motor ...
Pay attention to the position of the blue circle first, it is set motion, not set init
The next thing ... If you are in English, it is best to look up ...
First of all, those two "" "" "" are adjusted, because the default is the WHEEL is the wheel type, so we don’t need to adjust
Then what?The default settings are enough!
(If you don't want this magic turn effect, then adjust "Range of Limit" to 0 °)
IX weapon use and rotatable tutorial tutorial
How can the tank have no weapons!
First of all, the weapons provided by the mod are ...
From left to right: Gatling machine guns, missile launch nests, Bazuka guns, laser guns
Let's take Bazuka gun as an example
These four are from left to right: Ba Zuka gun tube, Bazuka cannon head, Ba Zuka cannon tail, and Ba Zuka scope
Only the head of the Bazuka cannon is the module of the shells, and the other modules are optional.
Still our cute 59 (I have some things)
Let's open the ordinary machine block next to the seat to put the Bazuka cannon's head module in
Exit again, this block becomes ...
Well, don't worry about activating the machine to slaughter. After you sit up, you find that you press every key on the keyboard and you will not be launched.
Because you need ...
Keyboard control board!(There must be a sound effect of dreaming of dreams) (I am not a teenager without a teenager)
Throw him in
First change the Execute Action to DO (otherwise the animation of the block itself will be covered) (don't ask me where the animation of the ordinary mechanical block comes from)
Then see Key Number?Now is Input Key 1, that is, key position 1
You can change it in the control of MC
Crying notebook
All squares can insert the key position control board to control its action!(But basically used on weapons)
Next, we should be a turret
First modify 59 ... Um ...
Note that the position of the blue circle is a mechanical block motor
(What? This is not like 59?) (Well, you can use ceramic repair agents and chisel carving this product)
Note again: All two motors are upward (that is, the yellow head facing up) (although it is two -way)
Let's open the motor of the pillers above and then put the keyboard control board in
I know what you are thinking, isn't it the X/Y/Z axis!Everyone knows!
I also wanted to finish the Z axis at that time (the higher you, the higher the time, the faster the speed of the time)
However……
WTF?Intersection
So remember: Don't refer to the XYZ axis, read English!(Then it should be the X -axis.) As for the rotating motor is also the same (if you really don't know how to make a message under the tutorial ... I promise to answer
Then the key position is set ... you find ...
Hey!Why can only turn clockwise/counterclockwise!
Hey!Why is this turret pitch angle of 360 °!
Hey!Why can this barrel only go up!
Then we have to use ...
Complex mode!
Please pay attention to Complex [x] This shows that this complex mode is for the X axis. If you want other shafts, use the keyboard to control the two "" "" "" "" "adjustment
So this should be like this after the setting of our pitch corner motor ...
That is, when we press the key position to set up the gun tube down, press the key position 2 gun tuning up, and set the graph of my own key position just now, then if I want the gun tube to go down ... (just pressSmall keyboard 1)
The motor that controls the rotation is also the same (if you don't know what to do, please participate in the prompt I give when the first emphasis is appeared)
OK!Then the mechanical part is completed!(Only for TANK TPYE)
Our 59 ...
So I originally wanted to put a 59 completely body, but I was too lazy to use a chisel to engrave, so don’t think about it
FollowLook mode:
After adjusting this mode, the machine rotation block will face the direction you are referred to by your quasi -star
X a few more difficult mechanical mode analysis
A: Helicopter mode
The slurry of the helicopter must be facing up, and it must be higher than the core.
The author's own Japanese video tutorial
I must!must!must!It will be updated!(Serious face)

National Service DNF Dark Ni
2025-01-28 09:19:27
The new screenshot of the be
2025-01-28 09:18:57
The 15th anniversary wallpap
2025-01-28 09:18:27
3DM Xuanyuan Sinicization Gr
2025-01-28 09:17:57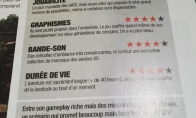
French magazine is the first
2025-01-28 09:17:27
The sneak game "Republic" wi
2025-01-28 09:16:57
The story between humans and
2025-01-28 09:16:27
Capture "Trinity 3: Artifact
2025-01-28 09:15:27
Wind direction change "Myste
2025-01-28 09:14:57
DICE's new project "Dream" w
2025-01-28 09:14:27
Pirate Minecraft Skins
Minecraft Skins
2024-12-10 04:11:27
Pirate Minecraft Skins
Minecraft Skins
2024-12-10 04:11:26
Master Minecraft Skins
Minecraft Skins
2024-12-10 04:11:25
King Minecraft Skins
Minecraft Skins
2024-12-10 04:11:25
Guide Minecraft Skins
Minecraft Skins
2024-12-10 04:11:24
Dark Knight Minecraft Skins
Minecraft Skins
2024-12-10 04:11:23
Sparta Minecraft Skins
Minecraft Skins
2024-12-10 04:11:23
Moncraft Skins of the War
Minecraft Skins
2024-12-10 04:11:22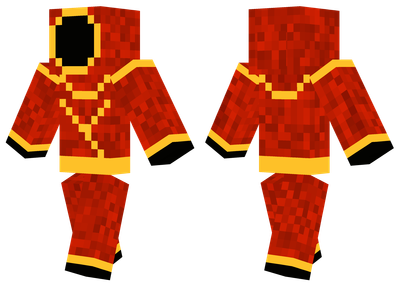
Red Witch Minecraft Skins
Minecraft Skins
2024-12-10 04:11:22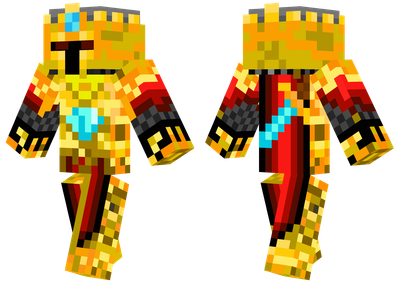
Golden Cavaliers Minecraft S
Minecraft Skins
2024-12-10 04:11:22