2024-12-09 18:31:58|Myriagame |source:minecraft skins
Why?I already have a design that can run normally. Why do I have to do more?
This tutorial can help readers use Packagedauto to build the automation of the core of the evolution of the dragon.In this tutorial, the automation of aggregation core has the following characteristics:
1) No conflict.Some synthetic tables in the Omnifactory integration package will conflict with other synthetic tables. For example, in the core of a synthetic table, the lower world star is required, and other synthetic tables need to put the stars of the lower boundary into the injected synthetic device.Conflicions will occur continuously at this time, and it is difficult to resolve except for re -building a polymerization device.
2) Preventure.This set of automation design will not block any circumstances, unless readers try to move the model bag storage.
3) Can be universal.This set of designs can handle any synthetic table, including 10 raw materials in 10 injects of synthetic devices.
Important reminder: This tutorial is applicable to the situation of creating a portable storage tank. At this time, there is no need to manually synthesize the awakening dragon block, and it can be made with fluid curing machines.This set of designs cannot make awakening dragon blocks without additional modification, and you can refer to the solution at the end of the text.Thanks to Taras#5560 for asking this question.
This tutorial sincerely recommends that readers follow the operation.The prerequisites mentioned in each step are necessary.The levels of various machines or containers can be replaced. For example, various levels of boxes in the Gray community version can be replaced by each other, or the original box is replaced with a plate box, but any replacement will not bring positive improvement to automation, that is, no willIt will improve speed, not to increase stability, and will not have magical effects.
Although this tutorial will try to be detailed as much as possible and gradually introduce the design, it is still assumed that readers are known to the functions and uses of PackageDauto.Can refer to the introduction of PackageDauto (Translator Note: English).
This tutorial is written by Neeve and the integrated package for the target is omnifactory.Welcome to the author's discord to chat and ask questions.
Make model
Prerequisite
Before making a model of PackageDauto:
a) 3 model bag memory,
b) 2 packages synthetic encoders
c) 2 packing machines
The two packagers are placed in any position in the ME network, and it is best to directly connect to the cable of AE2 instead of Enderio's cable.The cable using Enderio sometimes encounters strange problems, such as the disappearance of the model bag.
Make model
Make two packaging synthetic encoders, put a model packaging memory in the first one, and put two model packaging memory in the second one.Take the high -level transmission spell as an example.
Figure 1. The separation of the sample bag encoded
In the figure, coins are used instead of round stones, after all, there are more money.
According to the display of JEI (as shown in Figure 1B below), the synthesis table of the high -level transmission spell is very simple: the aggregation core is a transmission spell, the synthetic injection device is 4 dragon ingot, 1 dragon egg, and 3 last shadow pearls.
Then, in the first packaging synthetic encoder, all the items that are put into the injecting composition device into the model, that is, 4 dragon ingot, 1 dragon egg and 3 last shadow pearls.It is recommended to put a named props in the product location, which can be renamed a piece of stone in the original anvil to the product of the "Advanced Transmitted Mantra Pack" and set it as a package.Click to save, put the newly coded model bag memory in the first packing machine, and then place an order through the ME terminal to make this package and take it out.
Figure 1A. Place order to make this package.I hit the word "advanced", yes.
In the second packaging synthetic encoder, the synthetic table of the high -level transmission spell is added to the encoder (as shown in Figure 1b) through JEI.Remove all items other than transmitting spells from the input box, and add the newly obtained bag.At this time, the synthetic table should be made by a transmission spell+high -level transmission mantra.Click to save, and put one of the stored sample packages in the second packaging machine, and the other is left to the automated design later.
Figure 1b. Add the synthetic table through Jei, and anonymous readers suggest.❤️
Please refer to Figure 1 to ensure that everything is appropriate.
Assembly aggregation core
Prerequisite
Items required:
a) Enderio item catheter
b) Enderio erythered catheter
c) Enderio energy catheter
d) an Enderio induction redstone filter E) A magic interface of an Actually Additions, and a fantasy connector
f) 2 packagedauto unbalance machines
g) Ren Gray community version of the robotic arm (preferably LV)
h) Any level of Gray community edition conveyor belt (preferably LV)
i) an original box
j) A Gray community version of steel box
k) 1 Gray community version of items filtering
l) 10 injection synthetic devices
m) 1 aggregate core
Required tools:
a) Gray community version of the crowbar (avoid putting the error position of the coverage board)
b) Gray community version screwdriver is used to configure the cover version
c) Enderio's Ether Wrench
d) (optional) catheter detector to copy and paste the catheter settings
The core body of assembly aggregation
Place the core of the aggregation and inject the synthetic device in accordance with the way you like. You can also refer to my design (omitted the catheter) in Figure 2 as shown below.Please note that the placement of the synthetic device is not limited to this, as long as it can be connected correctly.Priority with readers' creativity!
Figure 2. The author's personal injection synthetic design can be changed at will.
After the placement is placed, switch all the injection synthetic device to a single item mode (empty -handed sneak+right -click).Use Enderio's items catheter to connect to all injection synthetic devices and set the input of the catheter to the white channel.Use the redstone guidance to link the polymerization core, hold the Ether wrench to sneak the left button, click the redstone tube, open the configuration interface connecting the polymerization core side, put a induction redstone filter, and press the settings below.Connect the redstone catheter all the way to the bottom.
Figure 3. Conflying the core red stone guidance settings.
Assembly packaging system
Figure 4. Package design
Please note that you must be placed according to the icon.
That's right, the fantasy interface is also necessary.
According to the above Figure 4, two charter, steel boxes, original boxes and fantasy interfaces are placed.Use the Enderio item catheter to connect the original box.Open the interface of the unblock machine and enable the blocking mode.Handheld fantasy connector, stealth+right -click the polymerization core, sneak+right -click the fantasy interface.
Figure 5. Seeing such a prompt explains the correct configuration.
Now holding the robotic arm and the quasi -stars at the Gray community version of the steel box, you can see the Gray community version of the grid line (see Figure 6).
Figure 6. Gray community version grid line.Right -click the exact position to place the cover version, that is, the robotic arm.
Figure 7. Place the robotic arm that faces the fantasy interface.
The exact position shown in Figure 6 and right -click to see the cover version of the box shown in Figure 7.The same operation is used with a conveyor belt, but this time placed it to the position shown in Figure 8 as shown below.
Figure 8. Put the conveyor belt here.
If you put it wrong, you can use the Gray community version of the crowbar to remove the cover version.
After putting it on the Gray community version of the screwdriver, right -click to place the position of the robotic arm (see Figure 6). After opening the interface, put it in the Gray community version of the items to filter, and change the robotic arm to the same as as shown in Figure 9 below.Configuration.That's right, it must be exactly the same.
Figure 9. Robotic arm settings (MV).
Explanation: This setting will enable all items other than the packing bags to enter the polymerization core, and it can ensure that only one item can be existed in the core at the same time to prevent blockage.Just make a pack with PackageDauto.
The default settings of the conveyor belt can meet the needs without additional configuration.
Right -click the item catheter connected to the box and configure it to receive the signal without working, and then set its output channel to white.
Figure 10. The original box catheter connection.Please note that the torch button shows the extinguisher torch.
Finally, put the model bag storage obtained from the model part of this tutorial into this charter.
Figure 11. The right -hand unblock machine.He also brought a nasty blue arrow.
Now you can use the habitual method to pull the core of the polymerization core from the core of the fantasy core.For example, the author uses Enderio's items to pull the item into the ME interface (Figure 12).Figure 12. Pull the product.
In the end, use the EIO energy catheter to power the full set of equipment, and it should eventually look like the following screenshot (Figure 13).
Figure 13. Full assembled aggregate synthetic device.Please note that the charter needs to connect to the system or energy catheter of AE2.
Finish!Now connect to the liberation machine on the right side to the ME network, and then you should see and place an automatic production of high -end transmission spells.
It is necessary to ensure that both charter machines use the blocking mode.When you need to add a new synthetic table, you must take out all the model bag storage, and coded according to the recommendations of the beginning of this tutorial.There are a total of 20 grids in the model bag storage, so you can encode up to 20 different synthetic tables!
Paidized, copy and paste
Readers who can see this article should have obtained a portable storage tank; readers who do not create portable storage tanks may not need to read this part.perhaps.
Figure 14. Multiple sets of aggregation cores wait for aggregation.But there is no way to aggregate awakening dragons.
Figure 15. Below the core of multiple sets of aggregation.Please note that this structure is repeated many times.
Since the props that need to be made (for the synthetic creation mode for the synthetic creation mode) after obtaining a portable storage tank), the core of parallelization is definitely not excessive: in other props other than awakened dragon blocks, the high -level synthetic spectrum of light needs to be needed.At least 80,000, think about how long it takes for a set of aggregates to synthesize.(Damn!)
Solution is to prepare multiple independent polymerization devices in parallel, and each set can handle all synthetic tables (except awakening dragon blocks).In addition, a centralized cache is needed to distribute the bags to each box.After having a portable storage tank, you no longer need to make the awakening dragon block by aggregation, so you do not need to make any modification for it. The rest is just a simple copy and paste.If there is no liquid storage tank, there is no need to make this step.
Figure 16. AE2 model, synthetic table depth +1
Figure 17. All the models required.Pay attention to the lack of awakening dragon blocks.
The first step needs to be removed from the first polymerization device to remove the model bag memory, which is useless behind this memory.Then, according to the figure above, all the formulas in the model bag memory are "converted" into AE2 model (except the awakened dragon block).
Place the order to make the corresponding package, then find the synthetic table in Jei and click the+button to add the synthetic table to the model terminal of the synthetic mode, then remove everything in the 3x3 raw material grid, and add the newly made bag to add the newly made bagTo the raw material, the final encoding (as shown in Figure 16).Each synthesis table in the model bag storage repeats the same operation, except for the awakening dragon block.
After completing, put a cache box near the place where the parallel aggregation device is preparing to build a parallel aggregation device, and connect two ME interfaces, at least one of which is the full square version (see Figure 18).Put the model just encoded in it, and then connect it to the ME network.
Figure. 18.
At this time, no matter how aggregating the order is made, the ME network will push a bag to this cache box. You need to distribute these packages to the first unblocking machine in all aggregate devices.You can use Enderio's items catheter. These catheters have built -in cycle mode (don't forget to enable), and then supplemented with the catheter speed to relegate to distribute the package quite uniformly.Important Tips: After that, don't put any model bag storage in the unblock machine!
If you want to accelerate, you can connect to some items for extraction, or divide the items of the unblock machine into different colors (that is, some white channels, some black channels, etc.).Or use your own way, or that sentence, watch the reader's creativity.
Figure 19. Complete design.
It should be noted that the bottleneck may be the bottleneck of this set of design, and the expansion of the packing machine is born for this. It is necessary to place it next to the packing machine to form a multi -square structure.Unfortunately, this is the only way to accelerate the packing machine.
Similarly, please point out where you have not written clearly.
Additional video: https://i.neeve.co/lavenderjubilantstag.mp4.
postscript
Although this tutorial is trying more detailed, there are still some places that they are not expressed clearly.Please use Google Docs's comment function to point out which parts of this tutorial need to be explained.
Once again, this tutorial is written by NEEVE, and the integrated package for the target is omnifactory.Welcome to the author's discord to chat and ask questions.
Improvement for awakened dragon blocks
You can temporarily repair the problem of unable to make awakened dragon blocks in the following way:
Put another fantasy interface connected to the core of the aggregation on the top of the steel box, and put another robotic arm on the top of the steel box, put it with 5 items that add 5 awakened dragon blocks, and set it to filter to filterOutput (any transmission).
PHOREAPER#9101
National Service DNF Dark Ni
2025-01-28 09:19:27
The new screenshot of the be
2025-01-28 09:18:57
The 15th anniversary wallpap
2025-01-28 09:18:27
3DM Xuanyuan Sinicization Gr
2025-01-28 09:17:57
French magazine is the first
2025-01-28 09:17:27
The sneak game "Republic" wi
2025-01-28 09:16:57
The story between humans and
2025-01-28 09:16:27
Capture "Trinity 3: Artifact
2025-01-28 09:15:27
Wind direction change "Myste
2025-01-28 09:14:57
DICE's new project "Dream" w
2025-01-28 09:14:27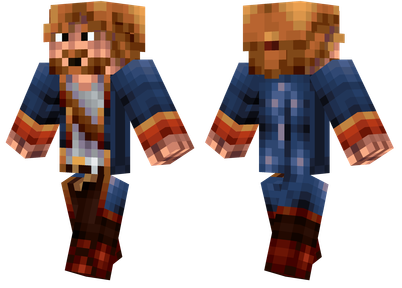
Pirate Minecraft Skins
Minecraft Skins
2024-12-10 04:11:27
Pirate Minecraft Skins
Minecraft Skins
2024-12-10 04:11:26
Master Minecraft Skins
Minecraft Skins
2024-12-10 04:11:25
King Minecraft Skins
Minecraft Skins
2024-12-10 04:11:25
Guide Minecraft Skins
Minecraft Skins
2024-12-10 04:11:24
Dark Knight Minecraft Skins
Minecraft Skins
2024-12-10 04:11:23
Sparta Minecraft Skins
Minecraft Skins
2024-12-10 04:11:23
Moncraft Skins of the War
Minecraft Skins
2024-12-10 04:11:22
Red Witch Minecraft Skins
Minecraft Skins
2024-12-10 04:11:22
Golden Cavaliers Minecraft S
Minecraft Skins
2024-12-10 04:11:22