2024-12-05 23:05:26|Myriagame |source:minecraft skins
This tutorial is set by the author to use the CC By-NC-ND protocol.
In front
Overview
HERACLES is a young task module. It has a complete basic function and graphical operation interface, which is suitable for integrated package makers.
HerraCles is part of the Project Odyssey series made by Terrarium Earth. This series includes (from left to right) team module Argonauts, task module Hermes, territorial module CAMETHEUS.As the same series, they can link each other to create a complete team game function.
The module's task is stored in the .mineCraft/Config/HERACLES directory, you can edit the task content outside the game.The structure of this directory is as follows:
HERACLES
存 Quests (store all task group folders)
│ The task group (store all tasks, the default Main)
│ 识 Task identifier. Json (stored separately for each task)
T Group.txt (store all the task group name)
L Tutorial.html
Notice
The module version demonstrated here is 1.1.11, and the MC version is 1.20.1 Fabric.
Herracles is still in a state of early development, and its content may be unstable. Some functions may vary with the change of the version.At the same time, please ensure that the HERACLES module you use is in the latest version.
This is the first time I write a tutorial. The content in the article comes from my experience. In the absence of any reference, the integrity and correctness cannot be guaranteed.Don't follow blindly, please look at this tutorial with a critical eyes.
If the content of the tutorial is wrong, please point out in the comment area.
Part of the noun explanation
Some nouns appearing in the article are similar and may be confused. I will make a brief interpretation in this section (not a strict definition, just make a simple distinction):
Task (quest): similar to the goal in progress, which may include one or more requirements;
Questline: Groups containing a series of tasks usually display all of the tasks in one page;
Task: Specific requirements in the task.
Partial practical command
Let a player complete a certain task:
/HERACles Complete
Settle the progress of a player in a certain task:
/Herracles Reset
Surprising all the tasks of a player:
/commands resetall
Create task
Open the task interface
By default, the button to open the task interface is U.
In addition to using the keyboard button, Herracles also has "task books" items, which need to be obtained using commands.
Integrated package authors can also use it as the initial item and give the first player to join the archive.Right -click the task book to open the task interface.
The task interface is shown below.Click "Switch Editing Mode" in the upper right corner to start creating and editing tasks.
After entering the editing mode, four buttons will appear in the upper left corner of the task interface, namely mobile/select [V], grabbed/drag tool [h], add task [u] and link tool [L].Their shortcut keys.
Move/select
Click the task to open the editing sidebar (title, subtitle, icon, dependence, etc.)
Double -click the task to enter the detailed settings (task description, requirements, rewards)
Drag the task can change its position on the interface
The grasping point/drag tool drags to move on the interface, and the coordinate adding tasks that will not change the task will be added at any location of the task area to create a task link tool.To hit other tasks, you can set the mission with a light blue border as a parent task.
Note: During the editing process, please develop the habit of pressing Ctrl + S at any time, because changes during editing may not be stored in time.
Create a new task
Select "Add task", click the left button at any position in the task area, and enter the task identifier in the pop -up dialog box (that is, the task ID, only ascii characters, will be used as the name of the task file).Click "Submit", the task icon will appear in the area you clicked before.
Editing task
Edit title, subtitral and location
Click "Move/Select" and then click a task. A editorial column will appear on the right side of the screen.Now you can enter any content in the text box of the title and subtitle.
Note: Although theoretically, the sub -title is accepted, please do not do this, because the control symbol of the change will be displayed as the control code.
You can specify the XY coordinates of the task icon in the "position", or you can directly drag the task icon to the desired position directly in the task interface.
Edit icon
Click the "Change icon" button in "Action" to select a new task icon in the dialog box.Click the "Switch Mode" in the upper left corner to switch all items, backpack items and labels.Click the item to complete the selection.
Click "Change the icon background" in "Action", select an icon background in the dialog box, and click to complete the selection.
Edit dependence
Click "Change Dependence" in "Action", enter the task identifier that wants to serve as a parent task in the text box above the dialog box, and then press "+" to complete the addition.One task can have multiple parent tasks.
Of course, you can also use the "link tool" to set the affiliate relationship.First click a task. After the light blue border appears, click other tasks to set the mission with a light blue border as a parent task.
There will be a line connection with arrows between the tasks of the affiliation.
All the parent tasks are displayed under the text box, and the "×" in the upper right corner can be deleted.
Note: There is a possibility of rendering between the connection lines between tasks. If there is no connection between the two tasks, you can withdraw from the task interface and re -enter.
Delete task
Click "Delete Task" in "Action", and select "Continue" in the pop -up dialog box to delete the task.
Note: In the version before 1.1.13, when a task is deleted, its child task will not be activated (#170).
Edit task setting
Click the "Edit Mission Settings" in "Action".
Independence progress*is not clearly hidden until
Lock: This task is always displayed
Stir: This task is displayed when there is a task item that is ongoing
Completed: The task will not be displayed (similar to the hidden progress)
Parent Visible: It will be displayed when its father's mission can be visible
The unlock notification shows whether the dependent arrow shows whether the dependent arrow shows the connection between the task and the parent task when the task is unlocked.
Edit task overview
When selecting "Move/Selection", double -click the task icon to enter the editing page.
First of all, a text editor is a text editor. It can be dragged by mouse to select the text, edit the color and format of the text, and even turn the text into a coded code.
However, the editor is not obtained and obtained. It relies on Hermes to store text in a way (similar to Markdown).If you want to preview the effect of the text, you must exit the editing mode.
Hermes enables users to insert a variety of content in the task overview. If you want to understand in -depth understanding, you can go to its Wiki, or take a look at this tutorial.
Edit task item
Select "Task items" in the left column and click "+" to create a new task item.
Select the type, enter the identifier (also requires ASCII characters), and then press "submit" to create the task item.The "Edit Task" window will be popped up later, where there will be setting items for this task item.The types of tasks selected before are different, and the setting items are different, and the differences will be divided into later.The following is the same setting item:
The title covers the title displayed by this task item, which can cover the icon displayed by any character icon to cover this task item. The selection method can refer to the previous "change icon"
Click "Save" to see the task items added only in the list.
Hanging the mouse on the task item, 2 buttons will appear on the right.The upper is the editor button. Click on the editing page of the task item; below is the delete button, and click to delete it.
The following will be roughly described as different tasks:
Change dimension
From one specified dimension to the other specified dimension, the conditions can be met.
From the original dimension ID or the label ID of the belonging to the ID of the target dimension or the label ID of the belonging
When it is not a complete ID in the input box, there will be prompts below the text box. Click Select to quickly enter.
In the later article, all text boxes that need to enter ID have this automatic completion mechanism.
structure
Enter the specified structure party to meet the conditions.
Id ID or the label ID of the structural target structure
experience
Get quantitative experience to meet the conditions.
The unit of experience type selection of experience, optional "level" or "value" experience quantity required to obtain experience collection type
Obtaining: Get the experience of the specified quantity to meet the conditions
Automatic submissions: After obtaining the specified number of experience and automatic deduction, the conditions can be met
Submission: Manually deduct the specified number of experiences and meet the conditions (will be marked "to submit the" two words)
virtual
The virtual task is deliberately set to be completed by the way that cannot be completed by the command. The use of this type of task is to set the task reward to the command to perform a virtual task, so as to establishconnect.
Virtual ID (shared)*It is not clearly described that the virtual task can be customized and described. This line is a system -generated task requirements in other types
Physical interaction
Right -click to specify the entity to meet the conditions.
The entity requires interactive entity ID or the label ID of the belonging
Biological group
You can meet the conditions when you reach the designated biological group.
The ID of the biological community target biological group or the label ID of the belonging
Object interaction
Right -module with the specified item can meet the conditions.
The items that need interaction or labels are required.
Block interaction
Right -click the specified block to meet the conditions.
The block ID of the block or the label ID of the belonging to
Kill the entity
Kill the specified number of specific entities to meet the conditions.
The entity to kill the entity that needs to be killed or the total number of entities that need to kill the number of label IDs that need to be killed
Obtain item
Get the specified number of specific items to meet the conditions.
The items that the items need to be obtained or the belonging to the belonging can be used to refer to the number of the number of items required to be obtained by the previous "change icon" quantity
Obtain: Obtain the specified number of items to meet the conditions
Automatic submissions: After obtaining the specified number of items and automatic deduction, the conditions can be met
Submit: Meet the condition after manually deducting the specified number of items (will be marked "to submit the" two words)
schedule
After obtaining the specified progress, the conditions can be met.
formula
You can meet the conditions after using the specified formula.
The formula ID needs to be used (you can view it in Jei, EMI and other modifiers)
examine
Click "即" to meet the conditions, which can be used to store precautions.
This type does not have special settings.
Statistics
The specified statistical data meets the specific values to meet the conditions.
The ID target of statistical data required by statistical data requires the value of statistical data needs to be achieved
Edit Reward
Select "Reward" in the left column. Click "+" to create a new reward.
Select the type, enter the identifier (also requires ASCII characters), and then press "Submit" to create the reward.
The "Edit Reward" window will be popped up later, including the setting item of this reward.The types of rewards that were previously selected were different, and the settings of the settings were different, and the differences will be divided into later.The following is the same setting item:
The title covers the title displayed by this reward, which can cover the icon displayed by any character icon. You can refer to the previous "change icon" for the selection method
Click "Save" to see the reward added in the list.
Hanging the mouse on the reward, 2 buttons will appear on the right.The upper is the editor button. Click on the editing page of the reward; below is the delete button, and click to delete it.
The following will be roughly described as different types of rewards:
experience
Reward the experience of specific quantities.
The units of the experience type selected, the experience of the "level" or "value" experience reward is optional
Order
Execute a command.
The command to execute
Note: The execution command should not be too long, you can only lose 32 words, and the excess part will be ignored.thing
Give a specified number of specific items.
For items or labels that items need to obtain, the choice method can refer
Litter
Get items randomly in the designated torrential table.
It is worth pointing out that by writing the loot table by yourself, the function of random rewards similar to FTBQ can be realized.
The warriper table ID specified by the Terront Watch
Note: In the module before the version 1.1.13, the loot watch is not automatically replenished.
Edit task group
On the left of the task interface is the task group bar. In the editing mode, there will be a "Creation Group" button in the upper right, that is, the dialog box will pop up. After entering the group name (accepting any character), click "Submit" to successfully create.
Note: Although the task group can include non -ASCII characters in theory, once these characters are included, the task files will be stored in the "main" directory, and garbled may appear when starting again.
When the mouse hides above the task group, the closing button will appear in the upper right corner, and click to delete the group.
You can only delete a group that does not include any tasks.
Localization
Note: Terrarium Earth does not give the specific method of localization. The following content comes from my exploration. It can only be regarded as a blind person. Therefore, everything is for reference only, and the specific method is subject to practice.
Herracles has clearly expressed the localization of supporting task text, and the translation dependence of different languages depends on the realization of resource packages.If you are an integrated package author and tailor your exclusive resource package (or exclusive module) for your integrated package, you can choose to place the translation file in your resource package (module).
At present, I have explored the translation methods of task title, sub -title, task title, and reward title. The task group name has not explored specific operation methods.
If you want to support other languages, you must use the translation key to replace the text in the task file.In the task identifier.json, the original content is
"or subtitle": "Title text"
The code should be replaced for
 "or subtitle" ": {
"Translate": "Translation button"
}
However, the title of task items and rewards needs to be replaced with
"title": "Translation key"
Just accept it.
In the attempt, I used the translation keys in the following format:
task group name. Naming space. Task identifier (. Any suffix)
The localized key name needs to be used as ASCII characters.
Among them, the naming space needs to be specified by itself, consistent with the resource package.The suffix is optional. It can be used as a prompt to distinguish the localized key name of the same task and different texts, so it is best to add.
For the translation of task overview, please refer to Hermes's wiki or this tutorial.
Then start making resource packages (the recommended side -to -task files are used to make resource packs), and create language files in them. For specific production methods and requirements, see Minecraft Wiki.
After finishing these, you should enter the game test.
If the text that needs to be translated is the translation key itself, please check:
Whether the game is refreshed, if no, please enter /RELOAD to load the task file, or load resource packages or language files;
Whether to miss or add more "translate", if so, please change and re -load the task file;
Is the format of the translation key correct? If so, please correct and re -load the task file;
Is there a corresponding translation in the language file?

National Service DNF Dark Ni
2025-01-28 09:19:27
The new screenshot of the be
2025-01-28 09:18:57
The 15th anniversary wallpap
2025-01-28 09:18:27
3DM Xuanyuan Sinicization Gr
2025-01-28 09:17:57
French magazine is the first
2025-01-28 09:17:27
The sneak game "Republic" wi
2025-01-28 09:16:57
The story between humans and
2025-01-28 09:16:27
Capture "Trinity 3: Artifact
2025-01-28 09:15:27
Wind direction change "Myste
2025-01-28 09:14:57
DICE's new project "Dream" w
2025-01-28 09:14:27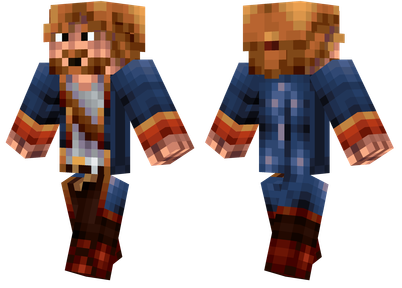
Pirate Minecraft Skins
Minecraft Skins
2024-12-10 04:11:27
Pirate Minecraft Skins
Minecraft Skins
2024-12-10 04:11:26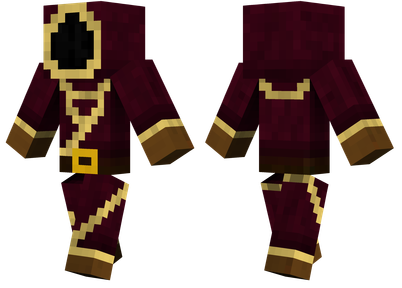
Master Minecraft Skins
Minecraft Skins
2024-12-10 04:11:25
King Minecraft Skins
Minecraft Skins
2024-12-10 04:11:25
Guide Minecraft Skins
Minecraft Skins
2024-12-10 04:11:24
Dark Knight Minecraft Skins
Minecraft Skins
2024-12-10 04:11:23
Sparta Minecraft Skins
Minecraft Skins
2024-12-10 04:11:23
Moncraft Skins of the War
Minecraft Skins
2024-12-10 04:11:22
Red Witch Minecraft Skins
Minecraft Skins
2024-12-10 04:11:22
Golden Cavaliers Minecraft S
Minecraft Skins
2024-12-10 04:11:22