2024-12-05 23:06:06|Myriagame |source:minecraft skins
This tutorial is set by the author to use the CC By-NC-SA protocol.
—————————————————————————————————————————————————————————————————————Intersection
This article explains the Baritone function interpretation of the actual game content and the author's documentation
Those who are capable and understand English can go to the author github warehouse to see: https://github.com/cabaletta/baritone/blob/1.19.4/usage.md is still too simple than
If you don't want to read the text and have the ability, this is the author's teaching screen: https://www.youtube.com/playList? List = Plnwnj1qss7coql9si-RTLuuzco_4OULPA English listening training ()
The Baritone version was 1.10.1 at the time of production. The instructions of each version of this module are different
Tip: Most of the UIs in this module appear directly in the chat bar in the form of chat.
If there is a purple [baritone] at the front of the chat bar, you don't have to worry
This module also linked Litematica projection module (only new version 1.10 or more), SCHEMATICA projection module (only old version 1.10) and the functions similar to Tweakeroo's soul. There is a linkage instruction to rely on the above modules and functions
Note: The text "HOME", "Sethome" and "?" (English question mark) will be identified by the module as the instruction to be unable to get out, and the Chinese question mark will not
TWEAKEROO's soul -out function will make the module unable to control the player, and you need to close it before you should reply
1.10 version below is only compatible with the blueprint of the SCHEMATICA projection module.
This module will be disturbed by fluids when finding the road, and it will not use ships and spleen. It will give priority to avoiding fluids. When using this module, you need to be wary of being killed by monsters!
A complete exit game will clear all the unbeatable tasks in the world, because these belong to the module cache, and the default is not preserved by default
—————————————————————————————————————————————————————————————————————————————————————————————————————————————————Intersection
------------------------------------------------------- Recommended here is common functions --------------------------------------------------------------------------------------------------------------------------------------------------------------------------------------------------------------------------------------------------------------------------------------------—---------------------
Common function
#GOTO-Has Road
Knowing the coordinates is still very comfortable, the above coordinates support "~" symbols instead of their own coordinates
Note: The following #LiteMatica instructions require Baritone 1.10 or above, and the version below 1.10 is #Schematica
#LITEMATICA- Read the position of the preview of the preview and build it
#LITEMATICA-Read the first place in the projection module and build it (the first one in the plans placed interface)
#COME-close to the camera
*Set target with the location of the camera and directly close to the target
Use Tweaker's soul out of the function to find things after finding things #Come directly to the camera location
#tunnel-digging level 1x2 tunnel
*Go forward with the northeast and northwest of the northeast, and excavate the 1x2 tunnel when the block is blocked.
Although I can’t dig the fish bone, I can still dig a lot of mines when I look back at the lower mines for a while.
#FARM-identify and cultivate/pick crops
*The sugarcane species of multi -square plants will retain 1 grid of the roots, and non -crop flowers and trees will not be picked
This time the pressure came to the artificial team
#MINE- Digging and collecting blocks
#Mine
Automatically collect blocks, there is a function of mineral permeability, but it will still be sanctioned by fake ore and other plug -ins.
#c-cancel the current task
When there is a dangerous behavior ... Use #c!
#wp-path point instruction class
*Select useful display
#WP S-Save the path point, you can have spaces+names later
#WP L-List all path points, and other operation buttons will appear in the chat bar, which can be deleted
picture:
After clicking the first line, delete the path point. After clicking, there will be a recovery page, which can be recovered. This deletion is to place it in the recycling station. After the next path point is deleted
The second line is set to the target point, which is the same as the #Goal
After clicking, you will automatically type #WP Save xxxx
List of the fourth line exhaled the road
#SEL-Selection Area and automatic replacement/mining/filling square function
*Quitely recommended instruction group
#SEL 1/2-Set the corner 1/angle 2 of the cube box selection area, you need to set the angle 1 to set the angle 2, the camera that is compatible with the soul, and the next frame of the camera is generated by default instead of the player collision in the collision of the playerThe lower body of the box, and the top angle is completely different from the target point. It can only be applied to the frame selection and cannot be removed by #C.
picture
The following instructions can be executed after the selection area is generated. 2 points must be set
#Sel f
#Sel R
#SEL C-clear all the box selection areas include angle 1 corner 2,#C instructions cannot be selected by the box
#Sel u-withdrawing one step, but cannot withdraw #Sel C
--------------------------------------------------------- Common functional recommendation End ----------------------------------------------------------------------------------------------------
------------------------------------------------------------- All instructions ------------------------------------------------------------------------------------------------------------------------------------------------
All instructions
#-Nozo
List all instructions in the chat bar
#help-instruction manual
#help-the function of the same "#" instructions above
#Help
#set-list the configuration list of this module
#Set
The Settings list of the author (raw meat): https://baritone.leijurv.com/baritone/api/Settings.html#Field.detail English learning training ()
#MODIFIED-Configuration Modification History
List the historical list of this module man for configuration modification
#Reset-reset module configuration
#Reset all-reset all configuration
#Reset
#Goal-Set the coordinate target point
The original version is a green box with a height of 2 length and width 1, as well as scanning special effects (the target point can be #path) will be cleared by #c
#Goal-Player ontology Set a target point
#Goal Clear-Clear the target point
#Goal
#Goal
#Goal
The above coordinates support "~" symbols instead of their own coordinates
#GOTO-Go to the selected designated coordinates
Generally, the lower body coordinates are judged
#Goto
#Goto
#Goto
#Goto
The above coordinates support "~" symbols instead of their own coordinates
#PATH-Close to set target points
Do not act when there is no goal. It is the same as that of #Invert away from the target antonym. The function is the same as the function of "#Goto". It is not set to the target point without setting the coordinate.#Proc-View information about the current task
Such as priority, target, task type, etc.
#ETA-Display the time to reach the place where the task is located
It shows the journey time you need on the way to work
#version-display this module version
#Repack-Re-load nearby blocks
After loading an error with the block, the function is the same as the re -loading block function triggered by the original MC shortcut keys, but this instruction will re -read the block information of this module
#Build-Build a blueprint
The projection module supports, build a blueprint for the designated file, the specified file.(The projection blueprint has the original point, and the blueprint built in this way is not previewed.) Note: The old version of Baritone cannot identify the .litematica suffix files projected by Litematica module, but the .schematic suffix files projected by Schematic module
#Build
#Build
#LITEMATICA- Read and build a preview of the projection module placement
Note: The #litematica instruction requires the version of Baritone1.10 or above. The old version is #Schematica, and the old version of Baritone cannot read the .litematica suffix file, but the .Schematic suffix file. The new version was the same.The new version of the module settings still retain the old version of the blueprint placing class setting XD
#LITEMATICA-Read the first place in the projection module and build it (the first one in the plans placed interface)
#Litematica <#>-Read the specified placed projection, and build (#placed the name of the projection, facing the place where the heavy-name projection can not be selected for any target)
#COME-close to the camera (after the soul out of the soul)
Set target with the location of the camera and approach the target directly
(Needing TWEAKEROO's freecamera: Soul -out tools or similar effects of similar modules. Second, the camera position of the three people is very special and will not be calculated)
#AXIS-Set y infinite goals in x = 0, z = 0
(Can be traveled by #Path)
#Forcecancel-forced cancel all tasks
#gc-call system.gc ()
This command is forced to launch the Java garbage recovery device, which is generally used when the Java virtual machine memory is in charge. Generally, when Java starts the System.gc invalidation
*But it cannot be used directly in the game, welcome to add
Specific introduction: https://cloud.tencent.com/developer/article/1554332 Thank you netizens @ゆめじゃ for your supplement
#INVERT-The goal set as far as possible as possible
Close to target antonyms with #Path
#tunnel-pointing in accuracy
*Generally, the Zhengdong/South/West/North/North/North/North/North/North/North/North
#Tunnel-Dig 1x2 tunnel when you move on the ground when you are on the ground
#Tunnel
Note: The center point on the one side, the square bottom surface, and the north/south/west/north direction of the quasi -heart -to -heart -oriented digging square space
The height of the first value is a square height
The second value width is the length of the side of the square itself.
The third value depth is the length of myself to the opposite side
Above ~
#RENDER-Quickly reload the block
*Reserve rendering and reloading blocks to repair abnormal blocks and re -load the block quickly
#FARM-identify and cultivate/pick crops
*Sugar cane will retain 1 grid of the roots, and non -crop flowers and trees will not be picked
#FARM-Wandering and identifying farming and picking crops
#FARM
#Farm
#follow-follow the entity
*Follow an entity or player
#Follow Entities-Root with all the recent physical creatures, physical deaths look for the next nearest
#Follow Entity
#Follow Players-Following the recent player, the player's death is looking for the next recent I have an idea
#Follow player
#ExploreFilter-Reading JSON block file
#Explorefilter
#saveall-save cache
All caches that preserve the world *(otherwise the game will be cleared after the game is closed, and the module settings will not be cleared)
#RELOADALL-Load
Re -load into the world's preserved module archetype
#Explore- Exploring the block
*Used to light up the original map and module map
#Explore-Exploring the block of itself
#Explore
#BLACKList
Finding the road will try to avoid this block (not directly used after testing, please add it)
#Find-Find a specified block
#Find
#mine-excavate specified block
*Execution of this instruction will give priority to collecting drops, unless it is full
#MINE
#CLICK-Explore the mouse and click Place the target
*Click the block to place the target point and go. This mode shields some keyboards, please press ESC to exit the mode
#Surface-Leave the mine until the open-air area
#TOP- p
But according to the test, it cannot play a role
#thisway-Putting infinite far-point targets to the quasi-heart
*Pointing to the direction of the direction to the east/west/south/north to generate an infinitely far away, it can be approached by #Path approaching the target
#Waypoins/#wp-path point management category
The following letters are lowercase
#WP L / List-List all path points
#WP L / List
#WP S / SAVE-Save the unnamed path point
#WP S / Save
#WP S / SAVE
#WP S / SAVE
#WP S / SAVE
#WP I / Info / Show
#WP D / DELETE
#WP RESTORE
#WP C / CLEAR
#WP G / GOAL
#WP GOTO
#SETHOME-Quick Set a path called "Home"
*No label
#Home-Starting close to the path of "Home"
*If you need to choose in the chat bar repeated, the mouse will display detailed information on the path point
#SEL-Selection Area and automatic replacement/mining/filling square function
*A sub -command and its multiple instructions, but you can frame the area to dig or fill in super heavy operations such as emptying or filling the square, but the module controls the player's operation from the motion to complete the task.
This instruction is very good, it is very, very easy to use
(#Sel 1/2 instructions to link TAWEAKEROO's soul out of the soul out, the soul can leave the body to set the point to set the point, pay attention to setting the point below the camera)
Note: The top angle is completely different from the target point. It can only be applied in the frame selection. It cannot be removed by #c. You need to use #Sel C
#Sel 1 -A top angle of the square frame selection area of the square is set up by the camera under the camera.
You must first #Sel 1 before you can #Sel 2
#Sel 2-Another top angle of the square frame constituencies of the square in a square coordinate under the camera, and closed the cube of the city
#Sel 2-
#Sel C-clear all the top angles set above
#Sel u-withdrawing once operation
#Sel f / s
#sel w <方块ID>-在所有框选区域东西南北边填充一层指定方块,跟砌墙一样,且只砌墙
#Sel SHL
#Sel CA- equivalent to #Sel f / s air
#Sel r
#Sel CP
#Sel p
But these two instructions cannot be used directly, I hope to have it to add
#Sel Expand
#Sel Contract
#Sel Contract
There are three targets: A/ALL owned, n/newest latest, O/Oldest first established
Direction 6 direction: up, down, east, west, north and south
#PAUSE-suspension task
*You can suspend all tasks, and can be continued to be executed by the instruction below
#Resume/#R-The task of continuing pause
*Continue to start the task of being suspended by #pause
#PAUSED-Query whether there is a task to be suspended
*Query whether there is a task to be suspended by #pause (because the module does not have other UI, it will not display whether it is suspended on the screen)
#Cancel/#C/#Stop-Cancel the current task
*Cancel the current task
#Damn's effect is unknown
*"#DAMN: Daniel" is right, the author github is written like this
Module 1.10.2 version newly added
ELYTRA-Use Hydin
Limited by the device, the specific function of the command cannot be tested for the time being
*This command enables the module to allow the use of spleen in the next session
#ELYTRA-
#Lytra Reset-reset state, but it will still keep flying to the target
#LYTRA Repack- Save all the loaded blocks to the local library
#Lytra supported-check whether your device supports this function
It is unclear whether Windows7 supports this function, but I recognize my Intel CPU as AMD: D
----------------------------------------------------------------------------------------------------------------------------------------------------------------------
Please add if there is any omissions

National Service DNF Dark Ni
2025-01-28 09:19:27
The new screenshot of the be
2025-01-28 09:18:57
The 15th anniversary wallpap
2025-01-28 09:18:27
3DM Xuanyuan Sinicization Gr
2025-01-28 09:17:57
French magazine is the first
2025-01-28 09:17:27
The sneak game "Republic" wi
2025-01-28 09:16:57
The story between humans and
2025-01-28 09:16:27
Capture "Trinity 3: Artifact
2025-01-28 09:15:27
Wind direction change "Myste
2025-01-28 09:14:57
DICE's new project "Dream" w
2025-01-28 09:14:27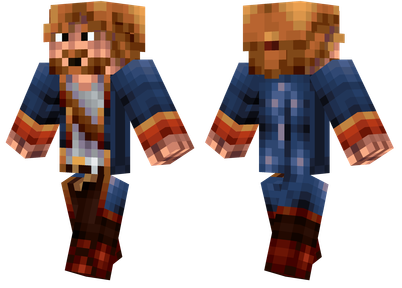
Pirate Minecraft Skins
Minecraft Skins
2024-12-10 04:11:27
Pirate Minecraft Skins
Minecraft Skins
2024-12-10 04:11:26
Master Minecraft Skins
Minecraft Skins
2024-12-10 04:11:25
King Minecraft Skins
Minecraft Skins
2024-12-10 04:11:25
Guide Minecraft Skins
Minecraft Skins
2024-12-10 04:11:24
Dark Knight Minecraft Skins
Minecraft Skins
2024-12-10 04:11:23
Sparta Minecraft Skins
Minecraft Skins
2024-12-10 04:11:23
Moncraft Skins of the War
Minecraft Skins
2024-12-10 04:11:22
Red Witch Minecraft Skins
Minecraft Skins
2024-12-10 04:11:22
Golden Cavaliers Minecraft S
Minecraft Skins
2024-12-10 04:11:22