2024-12-10 17:51:36|Myriagame |source:minecraft skins
This tutorial is set by the author to use the CC by-NC protocol.
I do n’t know if anyone is like me. After installing this MOD, I do n’t know how to add other MOD items?
If you are a little white that knows the programming like me, then this tutorial may be very suitable for you.
First, use the compression software to open the MOD file.
After opening, open the data folder.
Open the FarmingForBlockheads folder.
Open the FarmingForBlockheads_compat folder.
Then you will see this pile of json files.
Just open one, you will see the following editor software such as VSCode or NotePad3, of course, the notepad comes with Windows is no problem).
Next, I use the croptopia mod to make an example:
First of all, we need the ID ID in this MOD. The easiest way to find the ID is----
Enter the game, press F3+H, see the advanced prompt box in the lower left corner [Show], and then the mouse is moved to the item bar, and you can see that there is a line of code under the name of the corresponding item.
This is the item ID.
Then create a new TXT text, and write down the IDs you want to add to the items in the store.
Example: Croptopia: Rice_seed
"Rice seeds" is a remark, let you know which item corresponds to this code.
"Croptopia" is Modid, which means which MOD is classified as the item, and the original content is "Minecraft:".
"Rice_seed" is the corresponding ID of the rice seeds.
All punctuation symbols are in English, and you must not forget the colon.
Then create a txt file, named the English name of the corresponding MOD, such as "Croptopia".
Improve the code just now, change the corresponding part to the relevant content you want to join the MOD.
Example:
{{
"Modid": "Croptopia", // is the Modid mentioned earlier.
"Group": {
"Name": "croptopia", // means what the name of this classification is displayed on the UI classification items.
"Enabledbydefault": False, // means that the items in this classification display does not display. False is not displayed. True is displayed, or you can use this to change the file display of other Vanilla's beginning.Category, then choose false here, otherwise true.
"DefaultPayment": {// Represents what the items under this MOD classification are purchased by default, but the number of currencies cannot be modified here, so 1 by default.
"Item": "Minecraft: EMERALD" // Here it means that it is used as a currency item ID. Here is the emerald code, so the content of this classification will be purchased by the emerald by default.
},
"defaultCategory": "farmingforblockheads:seeds" //这里表示这个mod分类里的物品默认出现在哪个分类里,如果你想为这个MOD单独新建一个分类,那这里就不用管,而且这里无法新建分类,只Can use the default classification, so you can skip it.
},
"CUSTMENTRIES": [// means the following is the newly added item.
{{
"Output": "Croptopia: Rice_seed" // indicates that rice seeds appear in this MOD classification.
}, // If you have to add another item next, you must add a comma behind this bracket.
{{
"OUTPUT": "Croptopia: xxxxx"} // If this is the last item to be added, there is no need to add a comma behind this bracket.
]
}
Image example:
Save after entering, exit and rename it, and change the suffix to JSON.
Of course, a more time -saving method is to copy one of the JSON files in the corresponding folder in the corresponding folder, then modify it one by one, save and rename it.
Then add this modified JSON file to FarmingForblockheads_Compat folder.
In this way, this market MOD can identify the items you added.
If you do n’t do this, you can directly change the file in Config, and the MOD will report an error prompt to be unable to recognize. After you enter the game, you will not display the corresponding MOD items.
Notice:
All code is input in English input method. If you can use the English mode of Chinese input method such as QQ Pinyin, do not add Chinese content.
All the colonies will be empty and then enter the subsequent content.
There must be a corresponding upper serial mark behind all brackets, otherwise there will be errors.
Starting from the first large bracket to the end of the last large bracket, except // and the subsequent content in the middle, do not miss a punctuation symbol, especially those places with commas.
It is recommended to use software editing such as VSCode, NotePad3, which is more convenient than notes.
Then we turn on the config folder under the game directory (.minecraft), and found the FarmingForBlockheads folder, which contains a JSON file called Marketregition.
After opening this file, you will see a pair of {}.
Yes, there is nothing here.
If you have read tutorials written by SomeBody_liu before, then you should know what to do now.
If not, then enter the following content in {}.
Example:
{{
"CustomCategories": {// indicates a custom classification. Below this item adds the classification you want to build.
"ID_croptopia": {// This is the corresponding ID corresponding to this classification. The newly created items must be written after the corresponding classification ID before it will appear in that classification. Of course, you can write it casually.As long as you remember.
"Name": "croptopia", // here indicates that the name of this classification, you move the mouse to the corresponding classification bar and it will be displayed.
"Icon": {// Here is what the category should be used as an icon.
"Item": "Croptopia: Rice_seed" // The items corresponding to the items here are this classification icon. Here are rice seeds, so rice seeds will be used as icons.
}
}, // If you still have other classifications to be built next, then make a comma here, and then repeat the above process.example:
"Id_xyz": {
"Name": "xyz",
"Icon": {{
"Item": "xyz: abcd"
}
} // If there is no new classification operation next, do not add comma here.
},
"CUSTMENTRIES": [// Here is a custom -defined item, and the new items to be built are written under this project.
{{
"OUTPUT": {// Here indicates items that appear in the MOD store."Item": "Croptopia: Rice_seed", // Here is the item ID you want to add to the MOD. Write the ID of rice seeds, and you can buy rice seeds in the game.
"Count": 1 // The number of transactions is displayed here. How many can be obtained at a time and can be changed at will, but do not exceed 64.
},
"Payment": {// Here is a "currency" you want to buy.
"Item": "Minecraft: GOLD_NUGGET", // Here is an Id ID you want to use as "currency".
"Count": 5 // The quantity is displayed here, which refers to how much "currency" it costs a transaction. It means that 5 means that you can buy a rice seed with five golden grains and can be modified at will.
},
"Category": "ID_orptopia" // Here is what a classification of this new item is affiliated with, because the program only identifies the information of the "ID_" column, so you can write the corresponding classification ID here.
}, // If there are projects to be built new items next, then put the comma here, and then repeat the above steps.example:
{{
"OUTPUT": {
"Item": "xyz: abcd",
"Count": 1
},
"Payment": {
"Item": "Minecraft: GOLD_NUGGET",,
"Count": 5
},
"Category": "ID_xyz"
} // If there is no new item projects to be built next, don't add comma here.
]
}
Image example:
Note is the same as before, so it is not repeated.
Remember to save it after doing it. If there are a lot of MOD items to be added ... Take your time, you will always finish it.
The next step is a person's broken thought:
I changed the CONFIG file and touched the blood of my brain according to the tutorial. God knows what I think, I went to the folder in the MOD compression package, and found this method.
I knew the programming, like a green leather, relying on "thinking" to make up this method ...
The big guy must not have to look at this, but I don't know how many little white players who do not know how to program myself, I hope to help you.
The function is really powerful. In addition to things with NBT tags, things that can appear in the creative mode items can be bought ... as long as you are willing to spend time to change the configuration.

National Service DNF Dark Ni
2025-01-28 09:19:27
The new screenshot of the be
2025-01-28 09:18:57
The 15th anniversary wallpap
2025-01-28 09:18:27
3DM Xuanyuan Sinicization Gr
2025-01-28 09:17:57
French magazine is the first
2025-01-28 09:17:27
The sneak game "Republic" wi
2025-01-28 09:16:57
The story between humans and
2025-01-28 09:16:27
Capture "Trinity 3: Artifact
2025-01-28 09:15:27
Wind direction change "Myste
2025-01-28 09:14:57
DICE's new project "Dream" w
2025-01-28 09:14:27
Pirate Minecraft Skins
Minecraft Skins
2024-12-10 04:11:27
Pirate Minecraft Skins
Minecraft Skins
2024-12-10 04:11:26
Master Minecraft Skins
Minecraft Skins
2024-12-10 04:11:25
King Minecraft Skins
Minecraft Skins
2024-12-10 04:11:25
Guide Minecraft Skins
Minecraft Skins
2024-12-10 04:11:24
Dark Knight Minecraft Skins
Minecraft Skins
2024-12-10 04:11:23
Sparta Minecraft Skins
Minecraft Skins
2024-12-10 04:11:23
Moncraft Skins of the War
Minecraft Skins
2024-12-10 04:11:22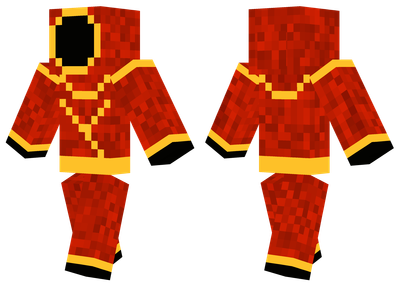
Red Witch Minecraft Skins
Minecraft Skins
2024-12-10 04:11:22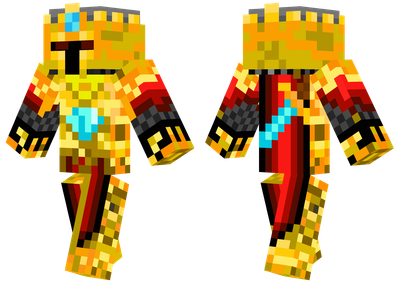
Golden Cavaliers Minecraft S
Minecraft Skins
2024-12-10 04:11:22