2024-12-10 17:52:26|Myriagame |source:minecraft skins
The foundation of all things!Optifine!
Optifine has very powerful CTM, CEM, CIT and other functions. Making related material packs requires MODs with such functions. Ignoring compatibility and loading speed Optifine is undoubtedly the best choice. There are also many mods that transplant these functions.For example, physical model features, Cit Resewn, etc. Here is a list for everyone to find similar MODs.
Cit --Forge cit
CEM -physical model characteristics
The physical texture related -NTITITY Texture Features (not a few in some aspects than Optifine, more recommended)
Custom Sky Box - Fabricskyboxes
CTM/block texture related –Connectness
The simplest one is the light -emitting texture!
To make a luminous texture, we need to install related mods, high -definition fixes or Entity Texture Features [physical emotion]+Connectedness [block/item light]]
Then make our material bag.
File path
Creating a folder is an indispensable process. The file path is Assets/Minecraft/Optifine/Emissive.properties
Emissive.properties is a key file.
Notice!Emissive.properties file must be placed in Minecraft/Optifine, and it will not take effect in any other modid/option.
Sticker
Then, put a new sticker under the folder you want to glow. The texture name is: the corresponding texture name _E, because the luminous texture is a layer of texture on the layer, so you want to draw what you want to draw.Yes, the premise is that the model reads the texture in the corresponding part.
Practice example
We take the original strange stalks as an example. The file path of the strange stalk is Assets/Minecraft/Textures/Block/Warped_Stem.png
We draw a texture as a luminous texture, and the file path is Assets/Minecraft/Textures/BLOCK/WARPED_STEM_EM_E.PNG
As I said, this is complete, which is very simple.
Let's enter the game to see the effect.
It can be seen that _E's texture is glowing.(This texture was drawn when I first painted the material bag, so it's hard to see, forgive me)
Random physical texture
Random physical texture requires high -definition repair or Entity Texture Features. If you want to make MOD -related random physical textures, use Entity Texture Features. The specific tutorial can refer to the tutorial on the ETF page.
File path
If it is the original version, the file path can be asseets/mincraft/option/mob or assets/minecraft/option/random/entity
In the original Minecraft/Textures/Entity folder, the stickers in the subfolder must also be placed in the subfolders in Assets/Minecraft/Optifine/Mob or Assets/Minecraft/Optifine/Random/Entity.
For example, the polar bear's stickers are in Minecraft/Textures/Entity/Bear folders, then our random physical texture should be placed in Assets/Minecraft/Optifine/Random/Entity/Bear folder.
Texture
As for the random texture, we need to name: Corresponding Patch 2.PNG. Note that this 2 is based on the number of stickers. The third is 3 and the fourth is four.Probability, Skin1 will be used if you can't find the corresponding texture, which is the original paste.
This is very simple, I don't want to give an example.
The beginning of suffering!Cit!
The CIT function requires high -definition repair or CIT Resewn/Forge Cit module.
CIT has many functions, such as customized potion/enchanting text texture, named the texture/model, and attach separate stickers to each item with NBT tags ... and so on
Potion
Pot is the simplest. This is more troublesome to explain. Let's take an example directly.
Lift a chestnut
We take the regenerative potion as an example
File path
The first is the file path:
Let's change the short -term regenerative potion without redstone first
Assets/Minecraft/Optifine/Cit/Potion/Regneitive/Regneitive_potion.properties Actually, the Properties file can be directly placed in the CIT/Potion folder, but for the convenience of classification, it is recommended to build a subfolder.
Internal text:
Type = item
items = poTION (this is very important)
Model = item/regeneration_p (This model name, for the convenience of my name, in fact, if you find it convenient, you named RP is okay, mainly depends on your model name)
nBT.Potion = Minecraft: Regneitive
Model
After the CIT folder is written, we have to add a model, file path:
Assets/Minecraft/Models/item/regeneration_p.json
This regeneration_p.json is a model file, which is casually taken, but at regeneration_potion.properties, the model = item/
Must fill in your model file name.
Model file text:
{"Parent": "Item/Generated", "Textures": {"layer0": "item/oven", "layer1": "item/regeneration_p"}}}}
I was too lazy to get empty. I just wrote QWQ.
Just one fill in the name of the post behind the two layers, and the other is replaced by a unified blank texture (anyway, I just do it).
Patch/texture
I took another picture of the ancient times to demonstrate.
Named: the name filled in in the model file, for example, I filled in regeneration_p and named it to regeneration_p.png
Demonstrate
Entering the game, you can see that a minute of regenerative potions have become like this.
CIT: Name change texture
During construction ...
Cit: enchantment book
When I learn, I must write QWQ.
CEM
CEM is a custom solid model, but both high -definition repair and physical model features only support the original entity.
Make your CEM model!
To make a CEM model, we need to use Blockbench.
Download the CEM Template Loader plug -in in Blockbench's plug -in page, and load the program Cem Template Loader on the homepage. Select the creatures you want to change. Here you choose the bitterness.
On this page, you can freely change the model of creature.
Then put the model you changed into the ASSETS/MINECRAFT/OPTIFINE/CEM folder, and you can customize the creature model.
Because my modeling level is very poor, I will not show it.
CTM
Welcome to the most tortured link -CTM!Need high -definition fixation or ConneCtedness.
There are two types of CTM, one is extended texture to other blocks [1.13+], and the other is to connect with a square to change the texture.
We use the gravel as the chestnut, and the file path is:
Assets/Minecraft/Optifine/CTM/Gravel/Gravel.propers
Although you can also put the CTM folder directly, I strongly recommend that you make a subclase, because the CTM has a lot of stickers.
matchblocks = soul_sand (connected to what blocks, the soul sand filled here, because it is convenient for testing)
Method = Overlay (This is an implementation method, filling overLay [cover])
tiles = 0-16 (Putral number, generally fill in 0-16, this is the place where the torture person, you want to draw 16 posts)
ConnectBlocks = Gravel
Connect = Block (No need to say, fill in block)
Layer = Translucent
Then ... we want to draw 16 stickers ... Here, in order to give you a tutorial (lazy) here, we will use BettervanillabuildingOverlay material to demonstrate.
This is the benefit of the subfolder.
This is a CTM covering other blocks outward, and then the CTM that changes texture when connecting seamless glass is used as an example.Assets/Minecraft/Optifine/CTM/Glass/Aregular/Glass.propers
matchBlocks = Glass
Method = ctm
tiles = 0-46
Clear Glass uses 46 stickers to handle the connection texture. I estimate that it does not need so much and does not fill in other texts. Those textures are a layer texture attached to the block itself, or directly replaced.

National Service DNF Dark Ni
2025-01-28 09:19:27
The new screenshot of the be
2025-01-28 09:18:57
The 15th anniversary wallpap
2025-01-28 09:18:27
3DM Xuanyuan Sinicization Gr
2025-01-28 09:17:57
French magazine is the first
2025-01-28 09:17:27
The sneak game "Republic" wi
2025-01-28 09:16:57
The story between humans and
2025-01-28 09:16:27
Capture "Trinity 3: Artifact
2025-01-28 09:15:27
Wind direction change "Myste
2025-01-28 09:14:57
DICE's new project "Dream" w
2025-01-28 09:14:27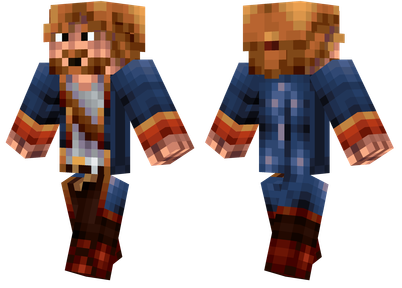
Pirate Minecraft Skins
Minecraft Skins
2024-12-10 04:11:27
Pirate Minecraft Skins
Minecraft Skins
2024-12-10 04:11:26
Master Minecraft Skins
Minecraft Skins
2024-12-10 04:11:25
King Minecraft Skins
Minecraft Skins
2024-12-10 04:11:25
Guide Minecraft Skins
Minecraft Skins
2024-12-10 04:11:24
Dark Knight Minecraft Skins
Minecraft Skins
2024-12-10 04:11:23
Sparta Minecraft Skins
Minecraft Skins
2024-12-10 04:11:23
Moncraft Skins of the War
Minecraft Skins
2024-12-10 04:11:22
Red Witch Minecraft Skins
Minecraft Skins
2024-12-10 04:11:22
Golden Cavaliers Minecraft S
Minecraft Skins
2024-12-10 04:11:22